
Working with Projects
TL;DR: Learn how to create, organize, and manage construction projects in AedisPro. Upload drawings, invite collaborators, and track progress through your takeoff workflow.
Before you start
Make sure you have:
- Project drawings uploaded (PDF, DWG, or image files)
- Project details and specifications ready
- Team member email addresses if collaboration is needed
Project Overview
AedisPro organizes all your construction projects in a centralized dashboard where you can easily access, manage, and track progress across multiple projects.
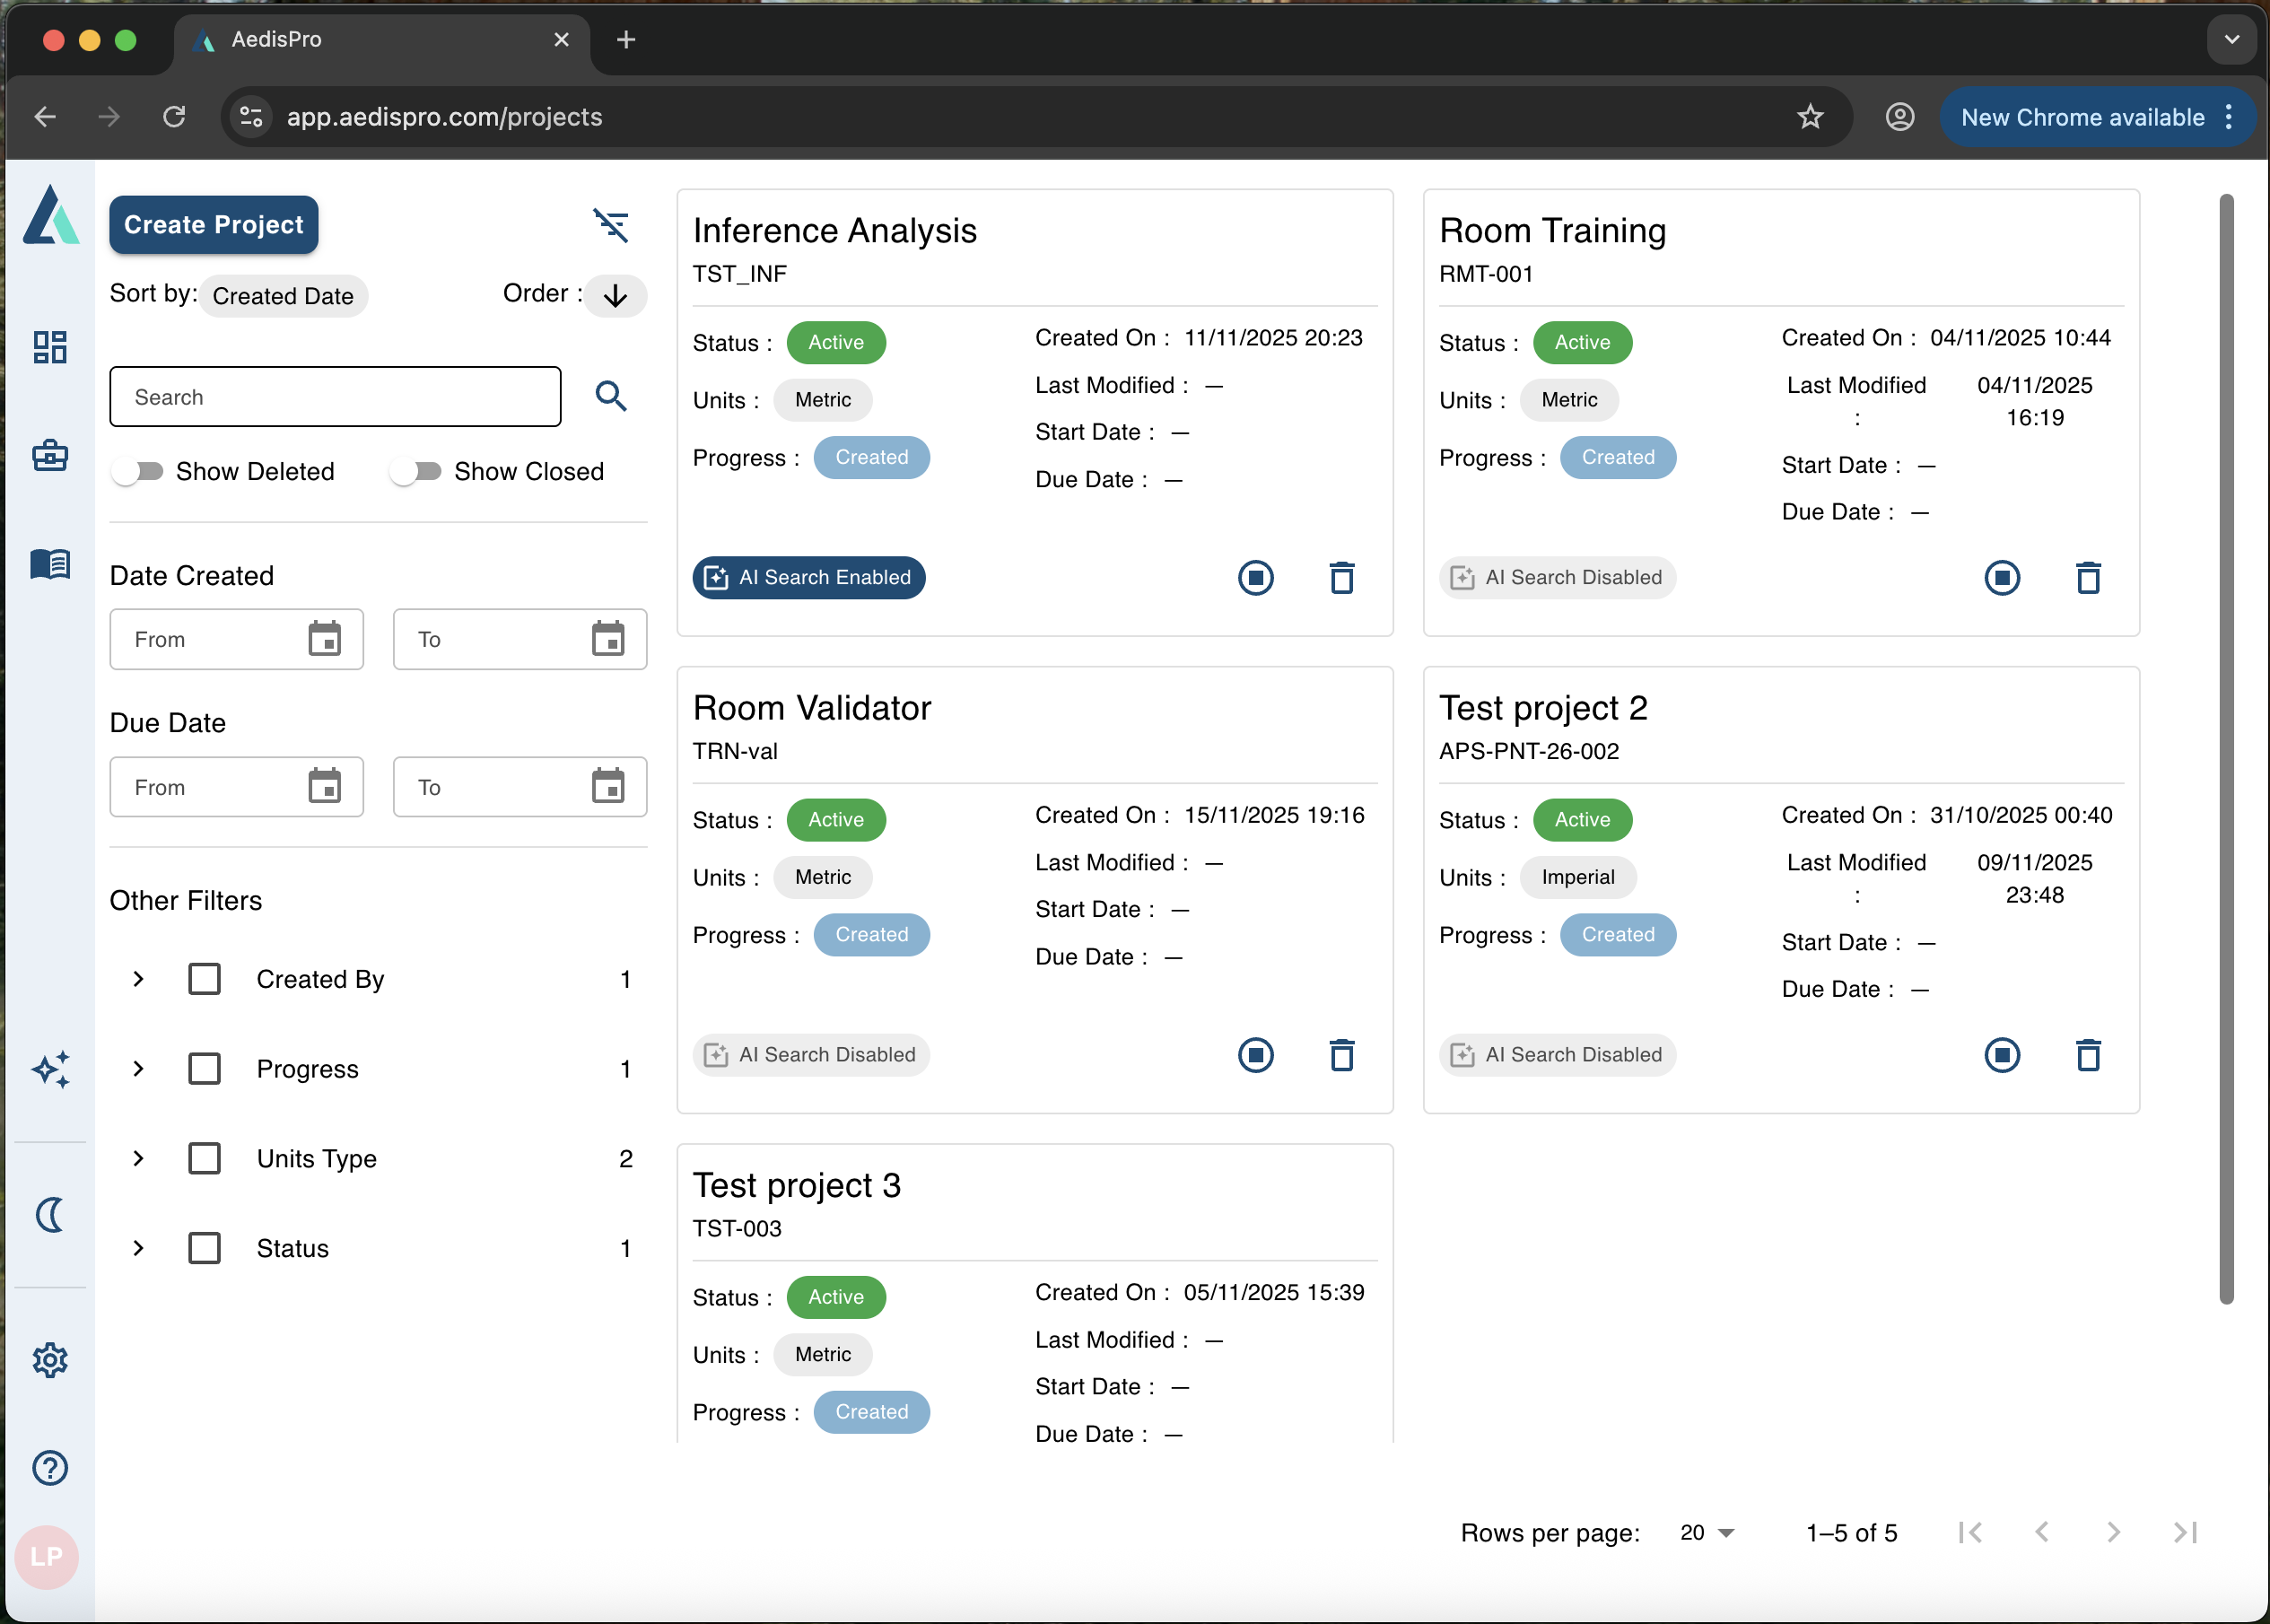
Projects dashboard with overview of all your construction projects
Steps
Creating a New Project
From your project view, click "Create Project" to start the project creation wizard. You'll be prompted to upload drawings, set project details, and configure initial settings.
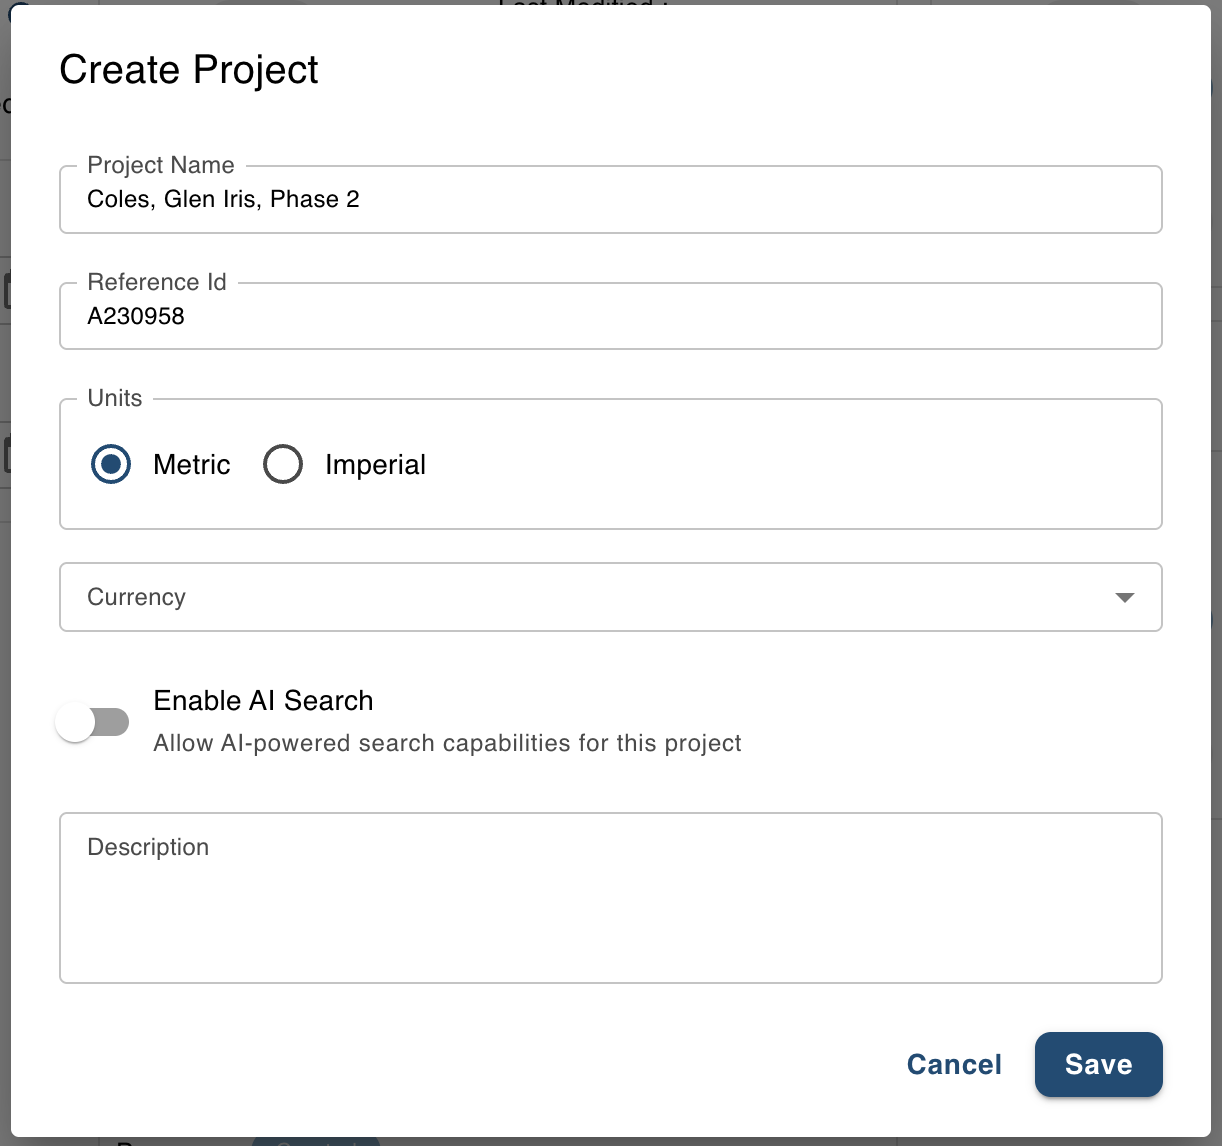
Project creation wizard for setting up new construction projects
- Click "New Project" from the dashboard
- Enter project details:
- Project name and description
- Project units
- Project currency, if you want to use pricing later.
- Enable AI search if you want to use AI chat features on uploaded drawings.
- Configure settings: Set units.
- Create project and start your takeoff workflow
Project Management & Navigation
Once created, each project provides a comprehensive overview with easy access to all drawings, measurements, takeoffs, and collaboration tools.
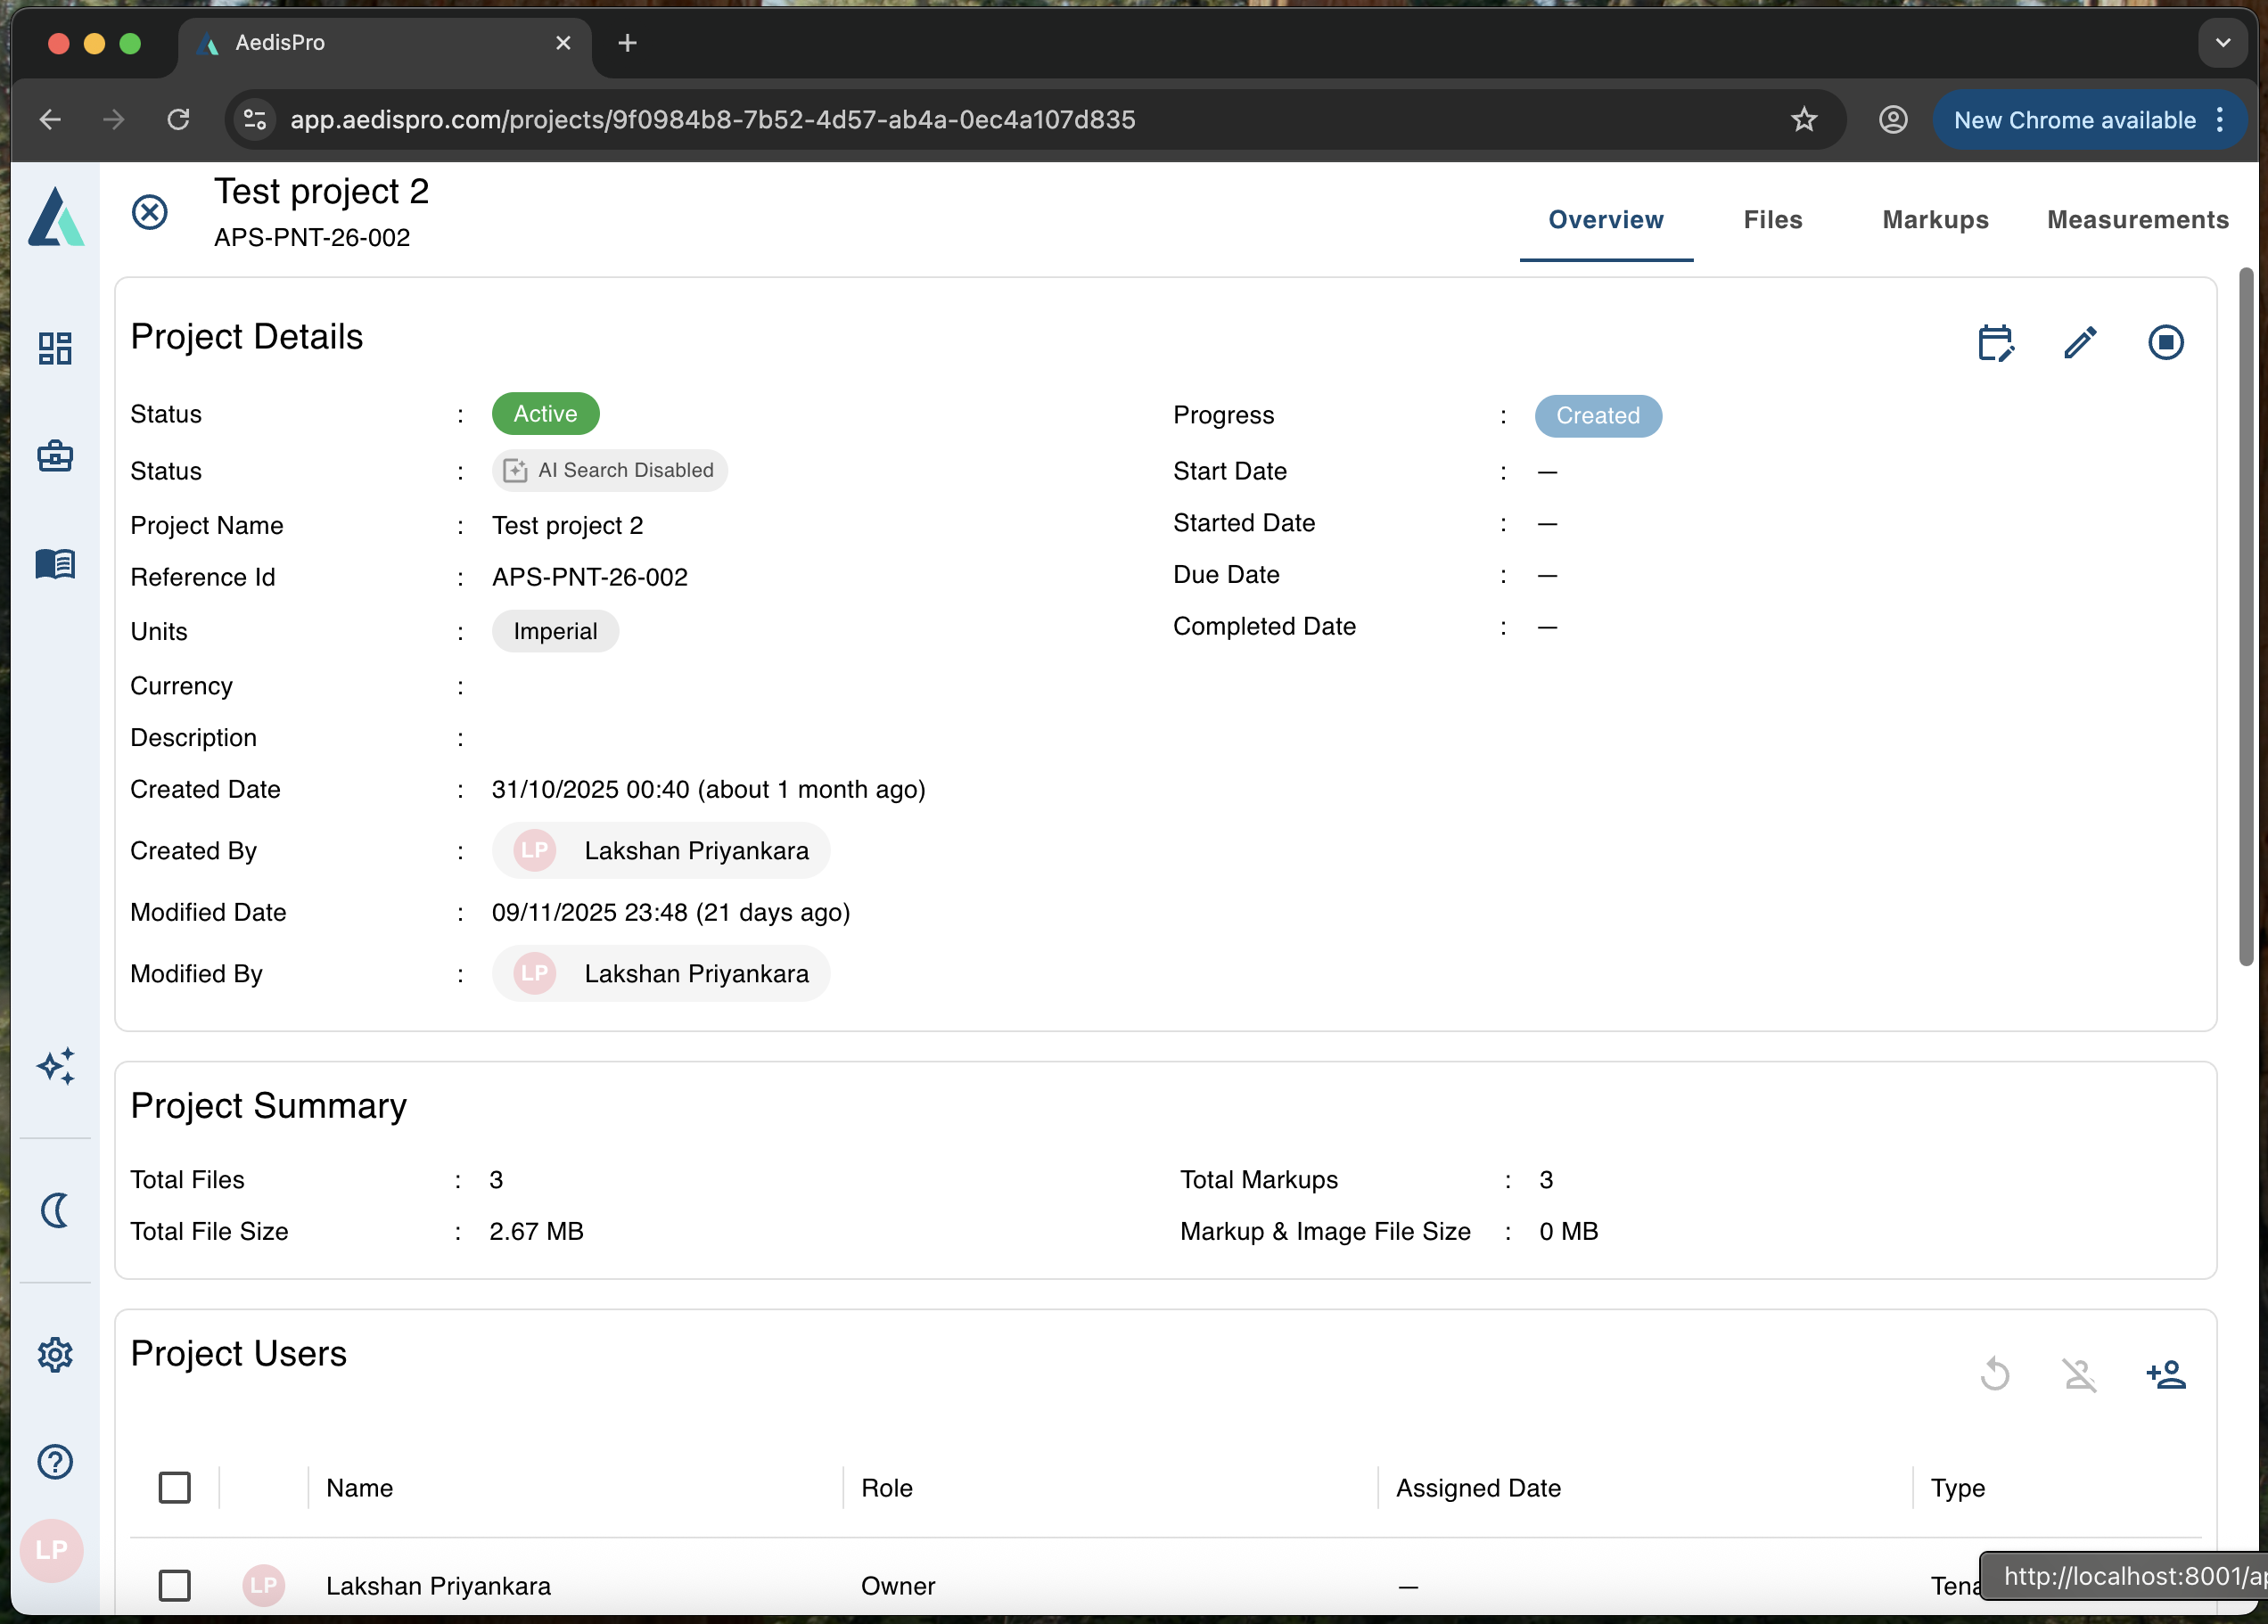
Individual project overview with drawings, measurements, and project tools
Organizing Project Files
AedisPro automatically organizes your uploaded files by type and allows you to create custom folders for better organization. Use descriptive names for easy identification.
Best Practice: Name your drawings consistently using a standard format like "ProjectName_FloorPlan_A101" to maintain organization across multiple projects.
Key Project Features
Each project in AedisPro provides access to powerful construction takeoff tools:
- Drawing Management: Upload, organize, and annotate construction drawings
- AI-Powered Takeoffs: Automated quantity takeoffs using machine learning
- Measurement Tools: Precise length, area, and count measurements
- Collaboration: Share projects and work with team members in real-time
- Export & Reporting: Generate detailed reports and export data
Project Settings & Configuration
Configure project-specific settings to match your workflow:
- Units of measurement: Imperial or metric units
- Default markup styles: Set consistent markup appearance
- Collaboration permissions: Control who can view and edit
Project Users
Managing Access with Project Users
AedisPro enforces project-level access control to ensure that only authorized team members can view or modify project data. Each project maintains its own list of Project Users, allowing you to collaborate efficiently while keeping sensitive project information secure.
Important:
- • Only users added to a project as Project Users will be able to access that project.
- • Tenant Admins can access all projects by default.
- • For more details, see the Roles & Permissions section.
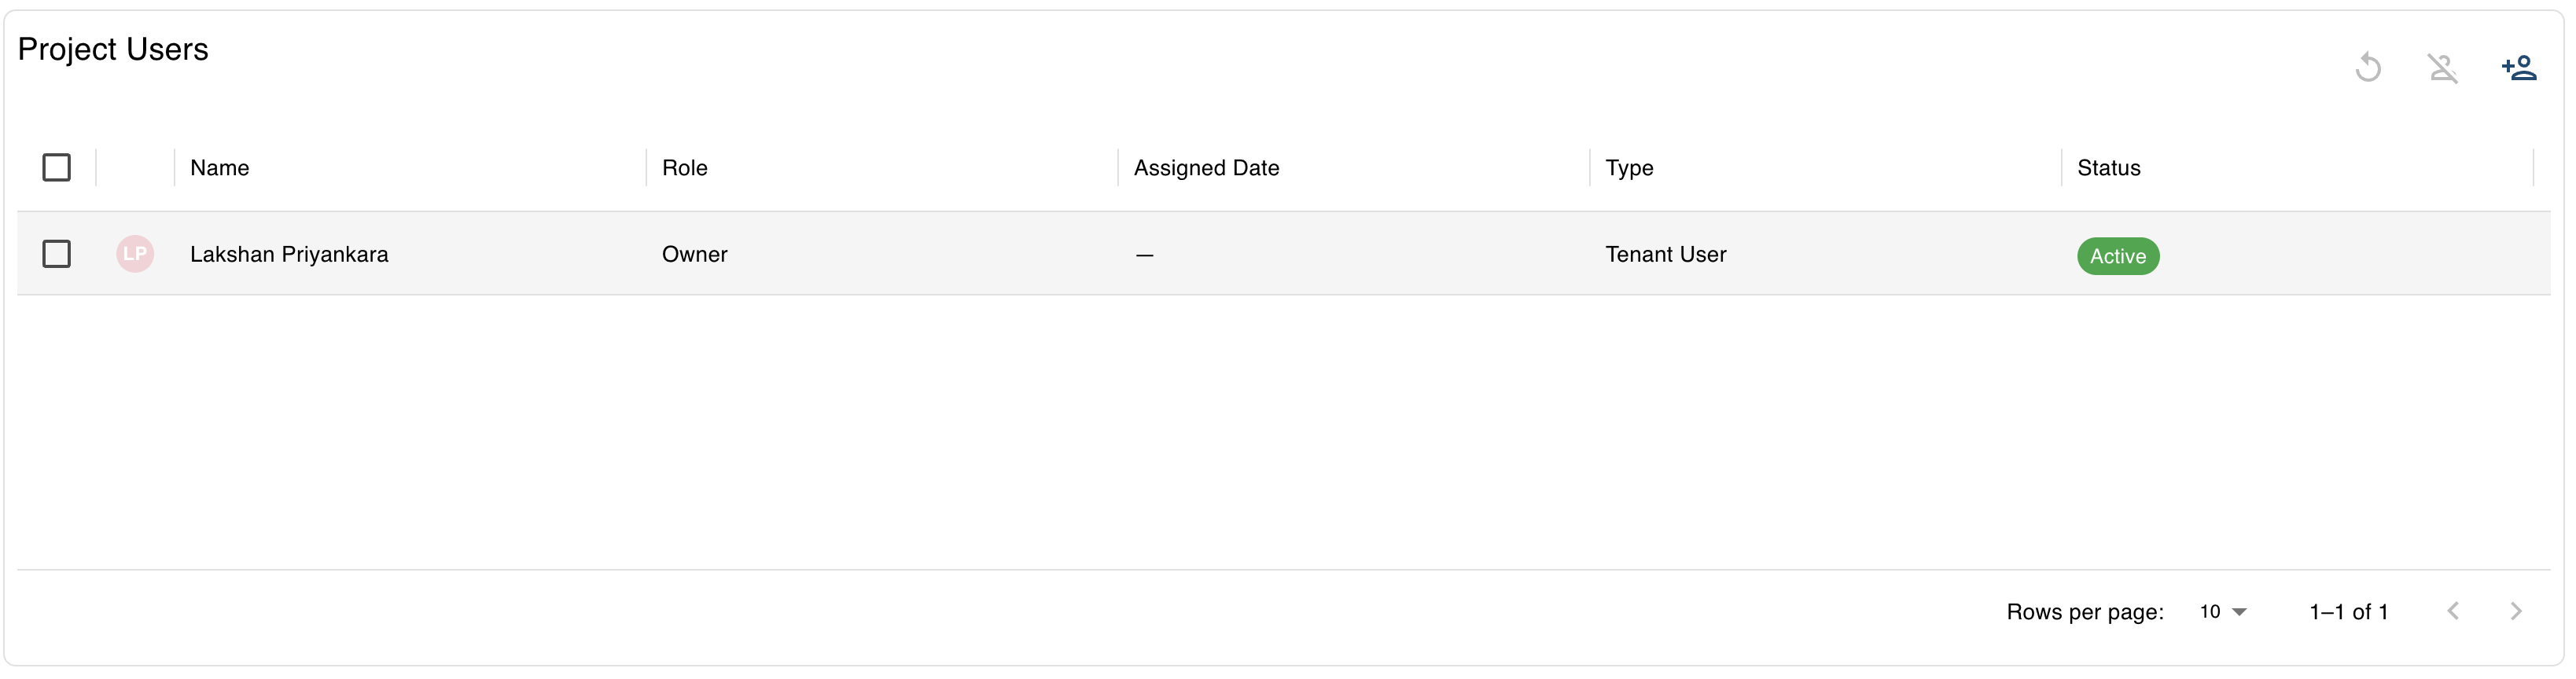
Project Users interface for managing team member access and permissions
Adding Project Users
To collaborate with team members:
- Open the desired project.
- Navigate to the Project Settings panel.
- Select the Project Users tab.
- Click Add User.
- Enter the team member's email or select from existing tenant users.
- Assign their permission level (Viewer / Editor / Contributor, depending on your setup).
- Click Invite.
The invited user will immediately appear in the project's user list and will gain access according to the assigned role.
Tip: Keep your project user list up to date and remove inactive members to maintain security and clarity.
Removing or Updating Users
You can modify access at any time:
- Change a user's permission level.
- Remove a user entirely from the project.
- Re-invite users who were previously removed.
These actions take effect immediately and help keep access tightly controlled across your team.
Best Practices for Project Users
- Add only the users who directly work on the project.
- Review the project user list when transferring work to a new team.
- Use Display Names (from tenant setup) to clearly identify external collaborators when sharing projects across tenants.
Project Price Books
Streamline Your Costing with Price Books
AedisPro allows you to connect your projects to predefined Price Books, eliminating the need to manually rebuild rates every time you start a new project.
Price Books help you:
- Maintain consistent pricing across the organization
- Reduce manual data entry
- Avoid repeated "do-overs" when preparing estimates
- Ensure your rates reflect the latest company standards
- Speed up your costing workflow significantly
Project Price Books interface for managing pricing and cost structures
Using Price Books in Your Project
When creating a new project—or from the Project Settings—you can load rates directly from an existing Price Book.
To load a Price Book:
- Open your project.
- Navigate to Project Settings.
- Select Price Books.
- Choose from your available tenant-level Price Books.
- Apply the Price Book to automatically populate:
- Labour rates
- Material rates
- Equipment rates
- Markups and overhead structures (if defined)
Your measurement and takeoff items will now use the selected Price Book as their pricing source.
Updating Rates in an Active Project
If your Price Book changes, you can optionally update project pricing to reflect the new rates.
- Apply all updates to refresh the entire project
- Apply selectively to keep custom overrides
- Leave project pricing unchanged if you prefer stable project-level rates
AedisPro always shows you a preview of what will change before applying updates.
Creating and Managing Price Books
Price Books are maintained at the tenant level, ensuring consistency across your entire organization.
You can:
- Create multiple Price Books (e.g., Residential, Commercial, Fit-Out, Regional variations)
- Duplicate existing Price Books for quick setup
- Update rates globally for all future projects
- Restrict who can create or edit Price Books based on permissions
Best Practices for Price Books
- Create separate Price Books for different service lines or regions.
- Standardize naming conventions to avoid confusion between similar books.
- Avoid editing Price Books during active tenders unless necessary.
- Train new estimators to always select the correct Price Book before starting takeoffs.
Verify Your Project Setup
After creating your project, verify that everything is working correctly:
- ✓ View all uploaded drawings in the project gallery
- ✓ Navigate between different drawing sheets and floors
- ✓ Access project settings and modify configuration
- ✓ Test measurement tools on sample drawings
- ✓ Invite team members and verify collaboration features
- ✓ Check that project appears in your main projects dashboard